Your cart is currently empty!
Using Custom Fields with WooCommerce Products
In this little tutorial, we will look at how you can use Custom Fields to add data to certain products and display the added information using a Child Theme we create for that purpose. In this particular example, we will show an external link as a button, after the Add to Cart button.
This example is motived by a case (Adding Multiple Product Types – External and Simple) where a shop offers to purchase products directly and also via Amazon. The solution is based on the requirement of adding such an external link in a fitting way.
First we will see how we can use Custom Fields to store the external URL, e.g. an Amazon product link, and then how we can use the woocommerce_after_add_to_cart_form action that WooCommerce provides to render the link for products that have the custom field defined.
Working with Custom Fields
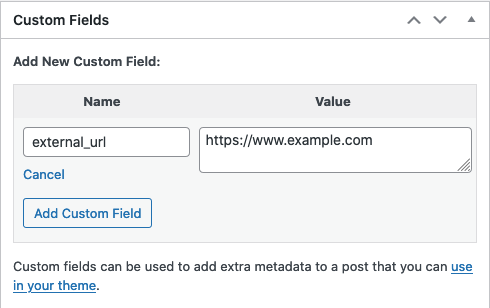
We will add one custom field named external_url to store the URL that is used for the link we add below the Add to Cart button.
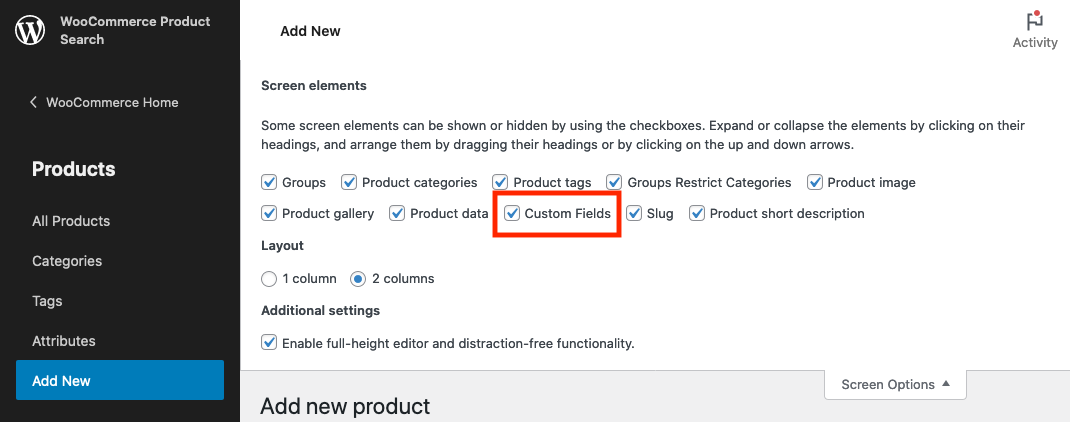
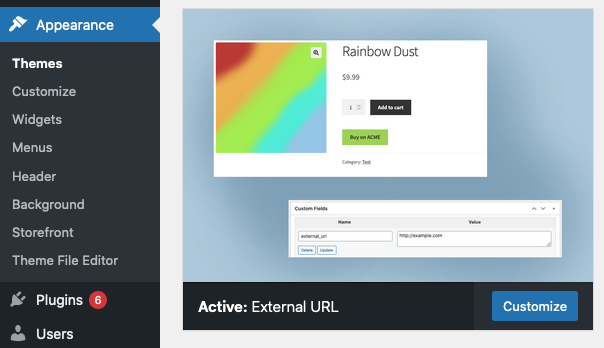
For this test, you can create a new product or use an existing one. In either case, when you edit the product make sure that under Screen Options, the option Custom Fields is checked:
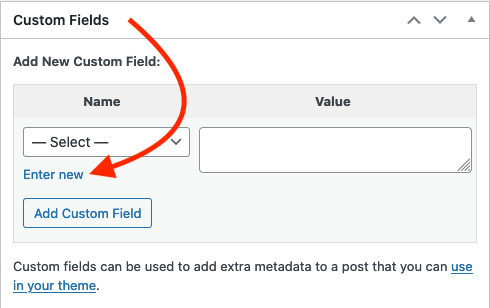
Give the product a name and price and scroll down to the Custom Fields section and click Enter new:
Choose external_url as the Name and provide the URL that you wish the link to point to in the Value field:
Now save or update the product to store the new custom field and its value for the product.
If you look at the product, nothing has changed yet, because we haven’t determined how the system is to display the added information yet. We will do this in the next section.
Displaying Custom Field Data
Install the Storefront theme if you haven’t already. Go to Appearance > Themes > Add New and search for Storefront. This is the default WooCommerce theme which is required as we are going to add a child theme based on it.

Now download our External URL child theme from the repository, upload and activate it. You can download the latest release from the Releases section of the repository. If you’re more adventurous, which I would certainly encourage you to be, fork the repository and clone your fork into your site’s themes folder. You can make modifications and persist those in your fork conveniently.
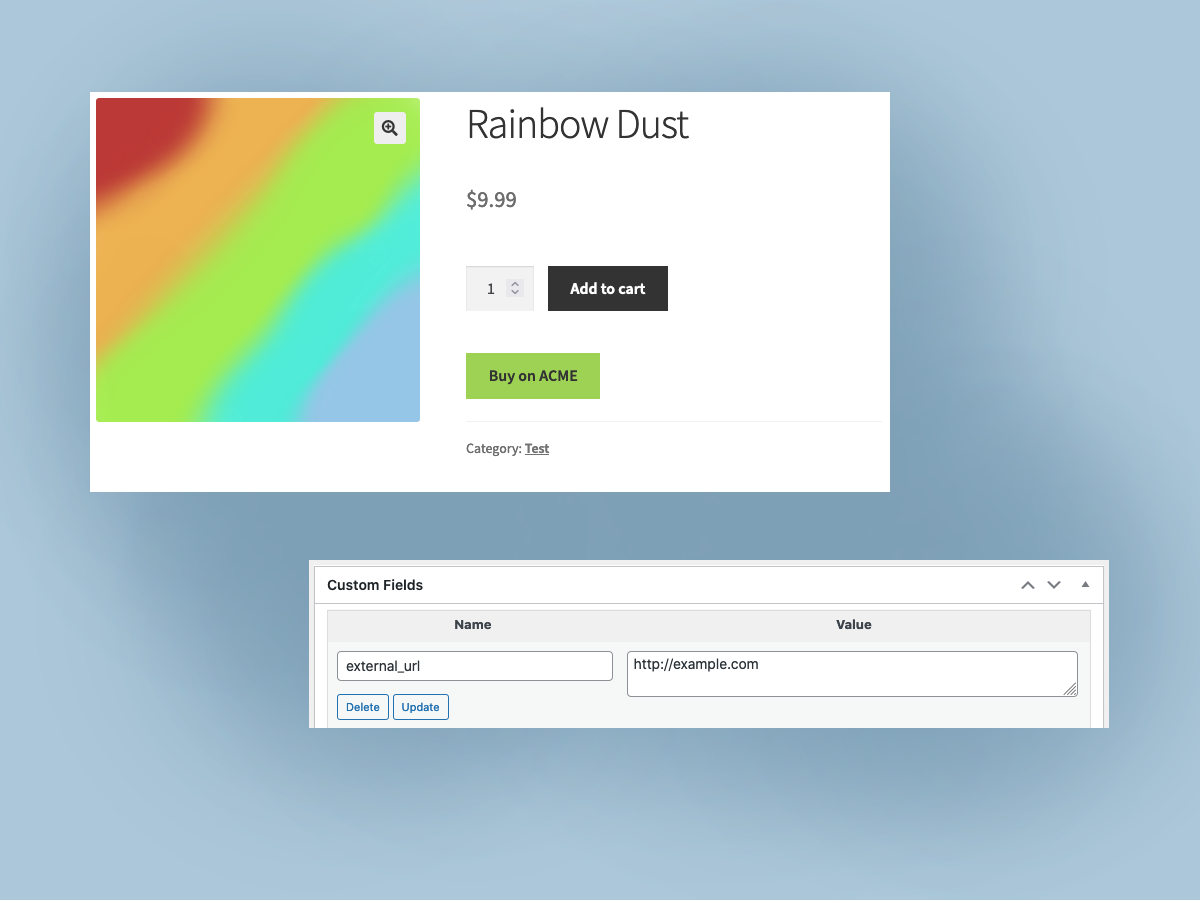
Next go and visit the product page of the product for which you have set the external_url custom field. With the External URL theme active, you will see the added button is rendered as promised.
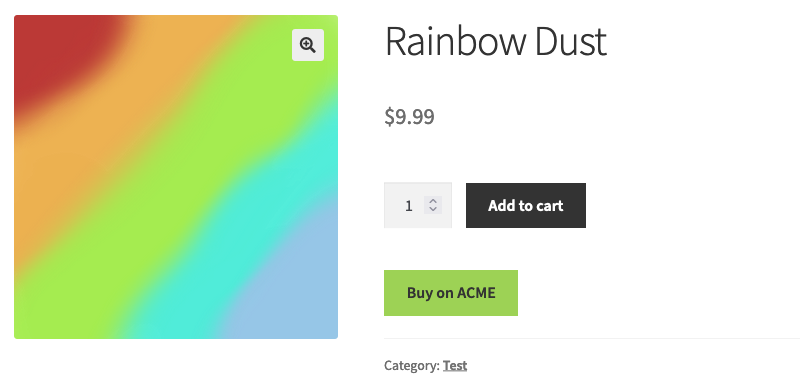
The new button labeled “Buy on ACME” links to the URL you have set via the external_url custom field.
As an additional option, you can change the default text that appears on the button by adding another custom field named external_url_label:

Update the product and see the changed label:

Congrats! You have successfully used standard WordPress Custom Fields to customize part of your product display.
Storefront Child Theme: External URL
As we have seen above, a key part and product of this tutorial is our External URL Storefront child theme. You download and use it directly, or fork the repository and modify it according to your requirements.
If you have any questions regarding the tutorial or the implementation of the child theme, feel free to comment below.
Leave a Reply